
10-31701
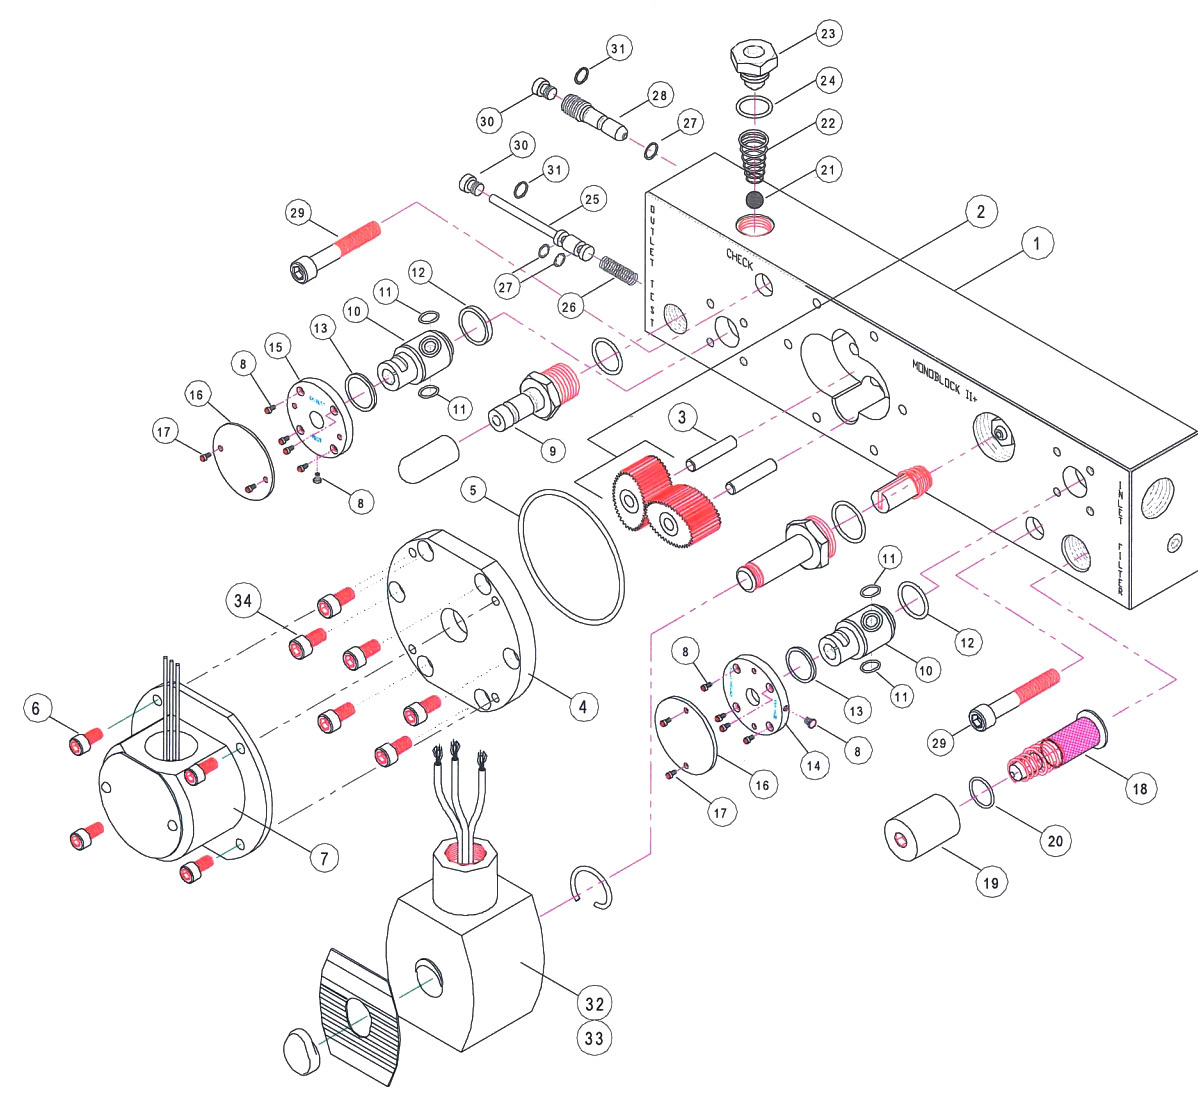
Mono-BlockTM II+
Honeywell Process Solutions
Request a Quote
In Stock
MBII+, Meter Cover, Figure #4
10-31702
Mono-BlockTM II+
Honeywell Process Solutions
Request a Quote
In Stock
MBII+, Diverter body, Figure #10
10-31703
Mono-BlockTM II+
Honeywell Process Solutions
Request a Quote
In Stock
MBII+, Valve Retainer, Open/Closed, Figure #14
10-31704
Mono-BlockTM II+
Honeywell Process Solutions
Request a Quote
In Stock
MBII+, Valve Retainer, Outlet/Test, Figure #15
10-31706
Mono-BlockTM II+
Honeywell Process Solutions
Request a Quote
In Stock
MBII+, Filter cap, Figure #19
10-31707
Mono-BlockTM II+
Honeywell Process Solutions
Request a Quote
In Stock
MBII+, Check Valve Cap, Figure #23
10-31708
Mono-BlockTM II+
Honeywell Process Solutions
Request a Quote
In Stock
MBII+, Expansion plug, Figure #25
10-31710
Mono-BlockTM II+
Honeywell Process Solutions
Request a Quote
In Stock
MBII+, Flow stem cap, Figure #30